
KDP are one of the biggest print on demand services currently available to self-publishing authors, as part of Amazon they have access to a truly massive market place, and have made the process getting your book published incredibly easy (without any upfront fees either), these are big reasons why so many authors use them to publish with.
So, when it comes to designing a book cover for your paperback with KDP, what should you be aware of and how easy is it?
Well, there are two aspects to take into consideration, the first is the technical side of your book cover and the second is the creative part. Both are important and both we’ll cover in this article.
First, let’s look at the creative aspect of your book cover design.
In order to create a book cover design which works, you must have a good understanding of the book itself, what is its message, the main focal point, what’s important and what’s not, what is the storyline, who are the characters, what is the book trying to achieve, and how can you sum this up with one image?
It helps to write a synopsis for your book, condense the key elements of it into a couple of pages at most, then condense this down further, take your time with this exercise, being able to really condense a manuscript down to its most important parts will help you to understand what the key point of focus is, and this is vital for the cover design.
Once you’ve established the focal point for the cover you should look at researching your genre.
This can be a fun part of the process, go to the online bookstores and look at the current best sellers for your genre, look at the style, the choice of font, imagery, book size, use of negative space, colors used, and themes which run across multiple books. Do as much research as you can, these other books are your competition, so you will want to ensure your own book cover holds its own within the same marketplace.
By now you should have an idea of the main focal point of your book, the styles and designs that current best-sellers utilize, next you’ll formulate ideas for your own draft design. This should take time and should also be an enjoyable process, play with different themes until you revise it into an idea that you’re happy with, but is also comparable to those within the bestseller lists.
Once you have figured out how you want your book cover to look, the next stage is in building it.
Creating a book cover design for a paperback with KDP is relatively straightforward, although it does help if you have an understanding of Photoshop and InDesign (some people use just Photoshop alone, but we prefer to use both Photoshop and InDesign in our book cover design process as InDesign works wonderfully for exporting designs for print).
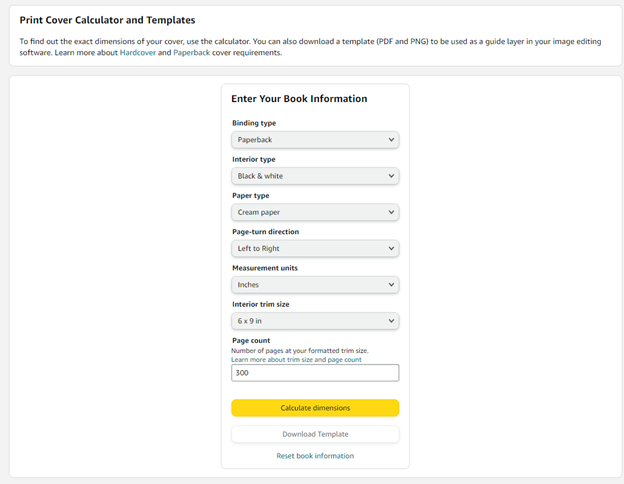
The first thing you will need is a template from KDP, these can be easily downloaded from their website and are very easy to set up, if you look at the screenshot, you’ll see that it will ask you several basic questions about your book. Once you select the relevant options and add your book’s page count, just click on the yellow ‘Calculate Dimensions’ button.
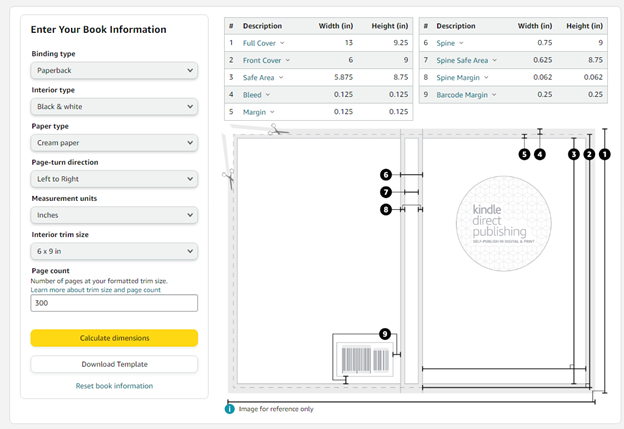
The next screen shows you the actual dimensions for your book cover, it also allows you to download the actual template that you’ll use for creating your book cover.
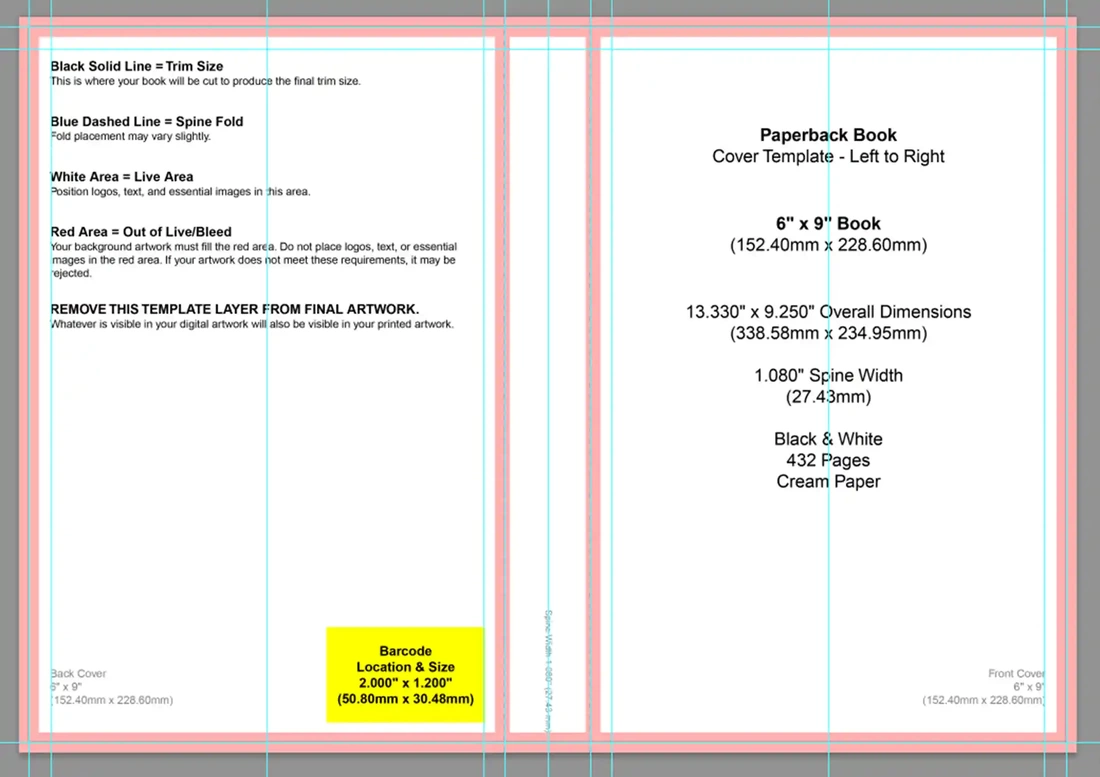
The downloaded zipped file will contain a PDF which you will use for your book cover, open this PDF within Photoshop and then set your rulers to mark where the margins and trim lines for the book cover are, this is really useful as it will help you to ensure that the important elements of the book are in the safe zones.
Once you have your template set up, save it as a separate file and now you can search for the elements which will be within the cover design.
Now, for most of our own book covers, we create multi-layered and photo manipulated images to encapsulate the concept of the book, if you’re used to using Photoshop and have a flare for creative design then have at it, if not, then you may be looking at using one specific image without many layers for your cover.
Whichever way you go with your own book cover, make sure that the images and the fonts you use come from reputable sources with the correct licenses. We prefer to use 123RF for any stock images and Adobe Fonts for our fonts (please make sure your check their websites for terms and conditions of licensing first).
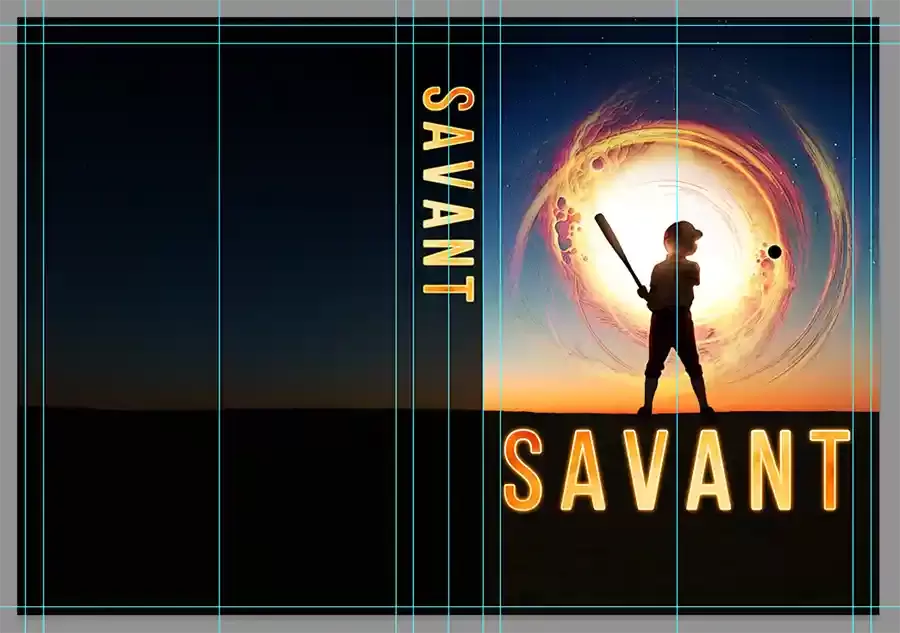
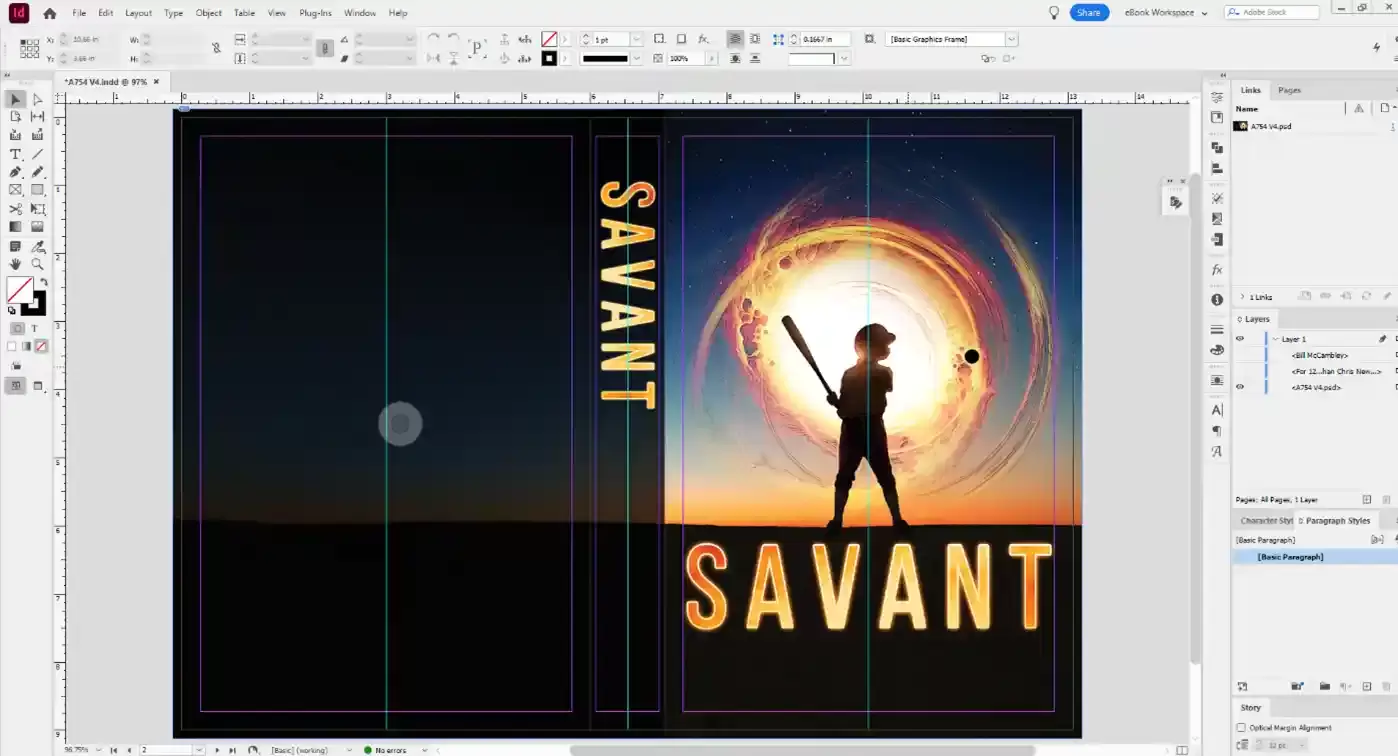
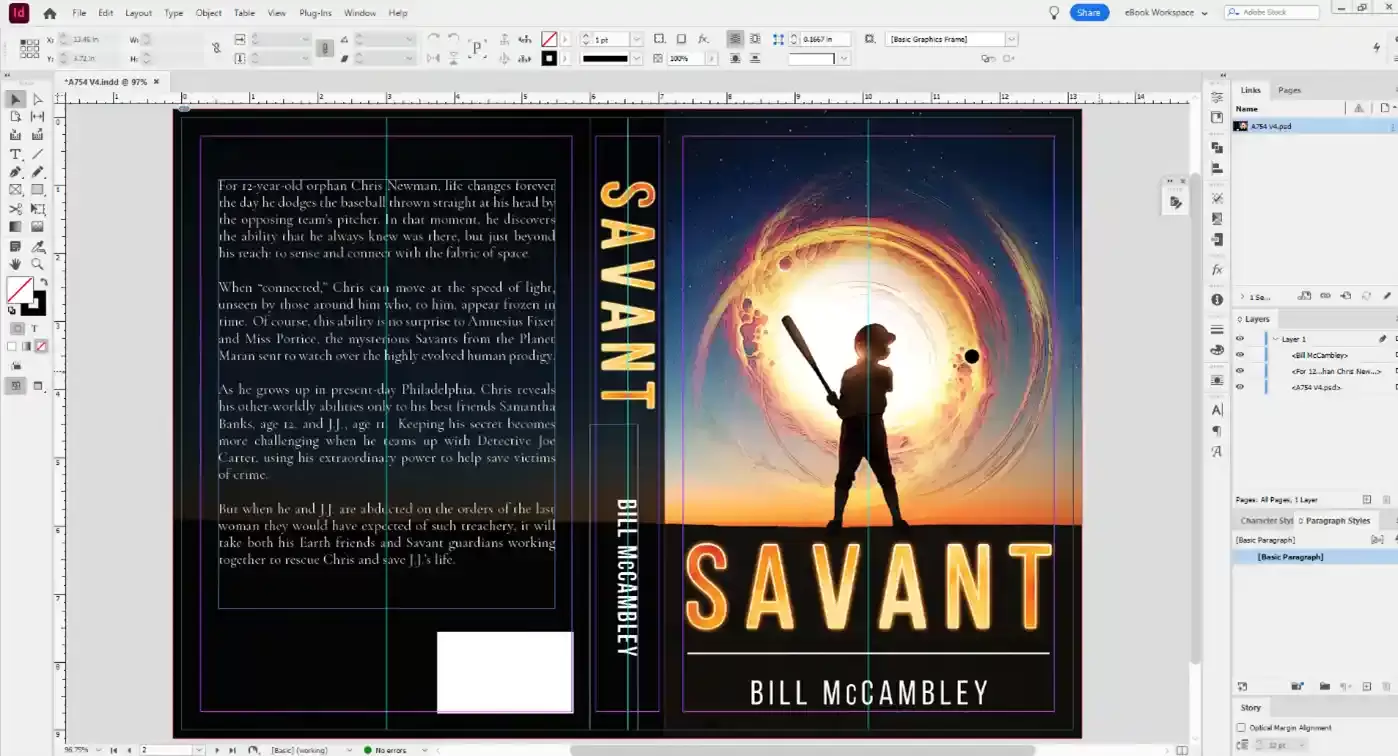
Below is a recent book cover design we created, you can see that the main elements of the design are within the margins and that the dark box over the back page and spine is aligned with the right edge of the spine (and does not run onto the front page).
Once you have created the artwork for the book cover, go into InDesign to set up the design with the text and get it ready for exporting to a print ready PDF.
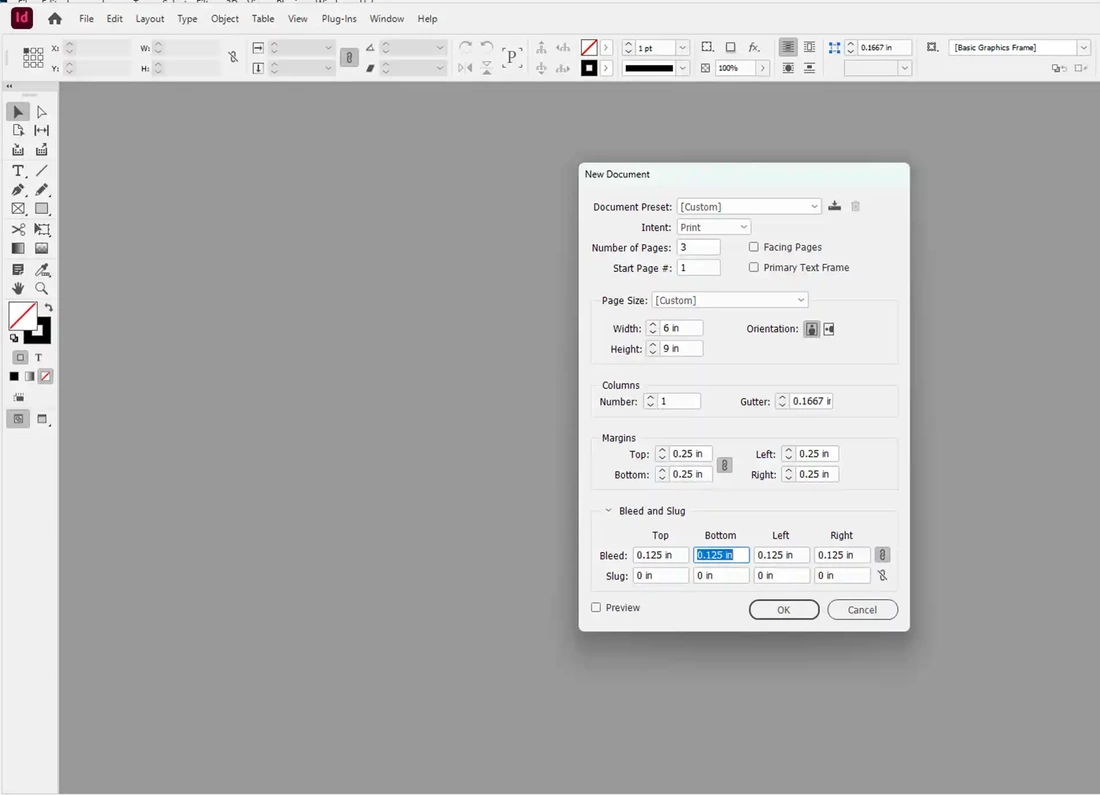
Open a new document and then set it up for three pages, uncheck the facing pages box, and then add the width and height (for this book its 6x9), next set the margins for 0.25in and the bleed for 0.125in, then click on ‘ok’.
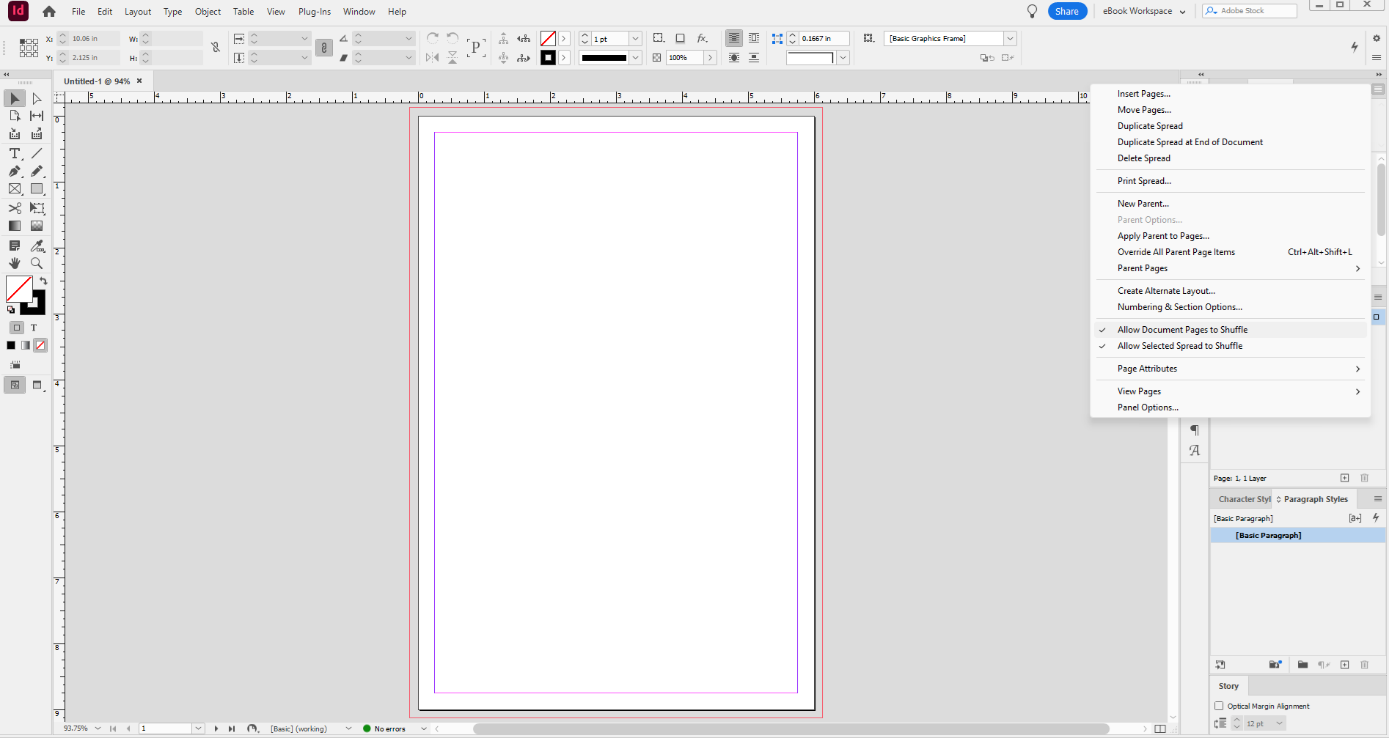
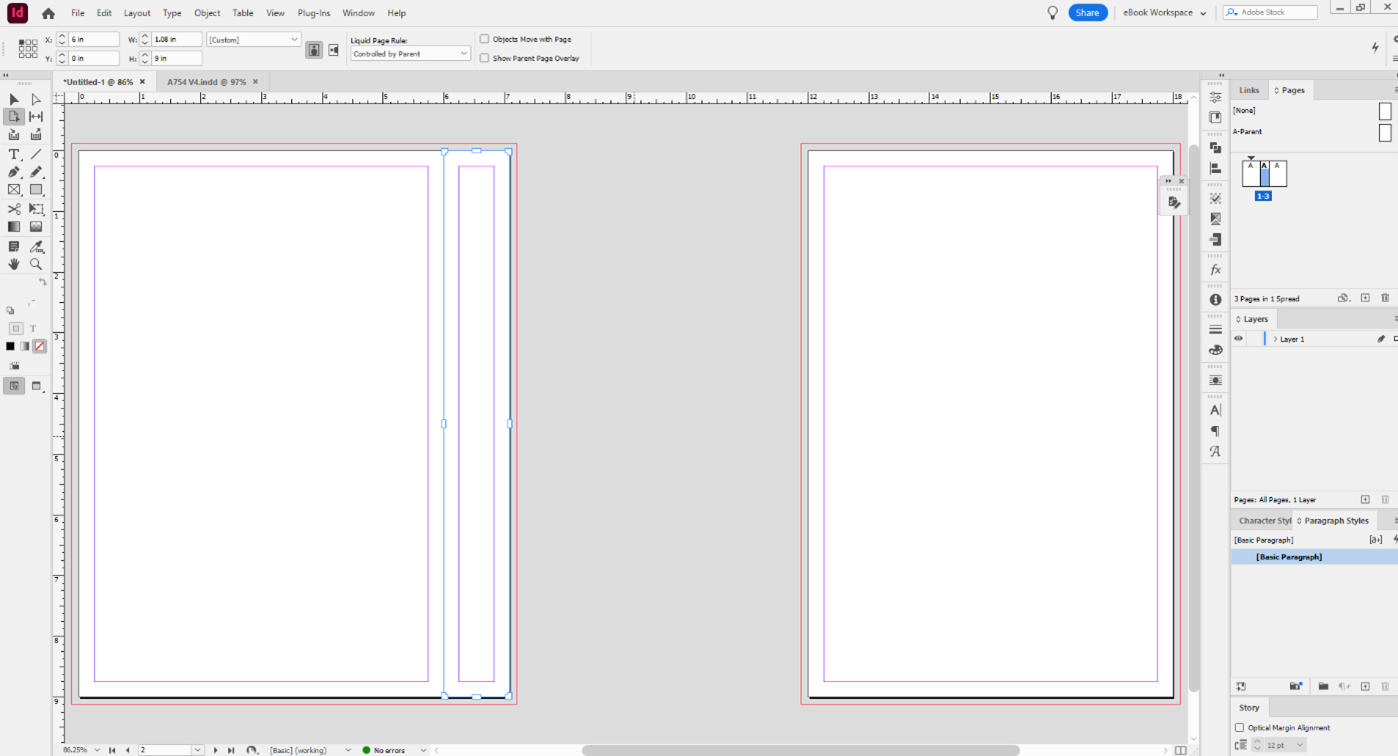
You’ll next need to set up the document ready for your artwork, getting the layout correct first. In the pages tab, click on the options button and then deselect allow document pages to shuffle.
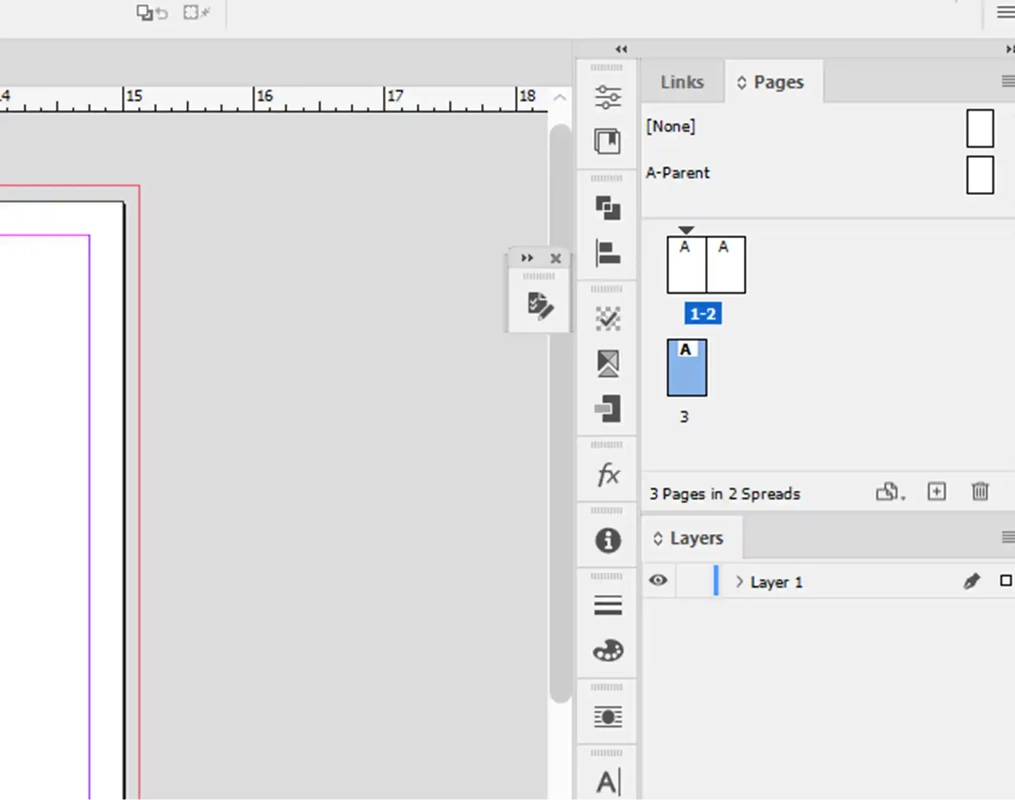
Now you can click and drag on each page so that they are next to each other within the pages box (see below.
Next, you’ll need to set up the spine to match KDP’s requirements for your book.
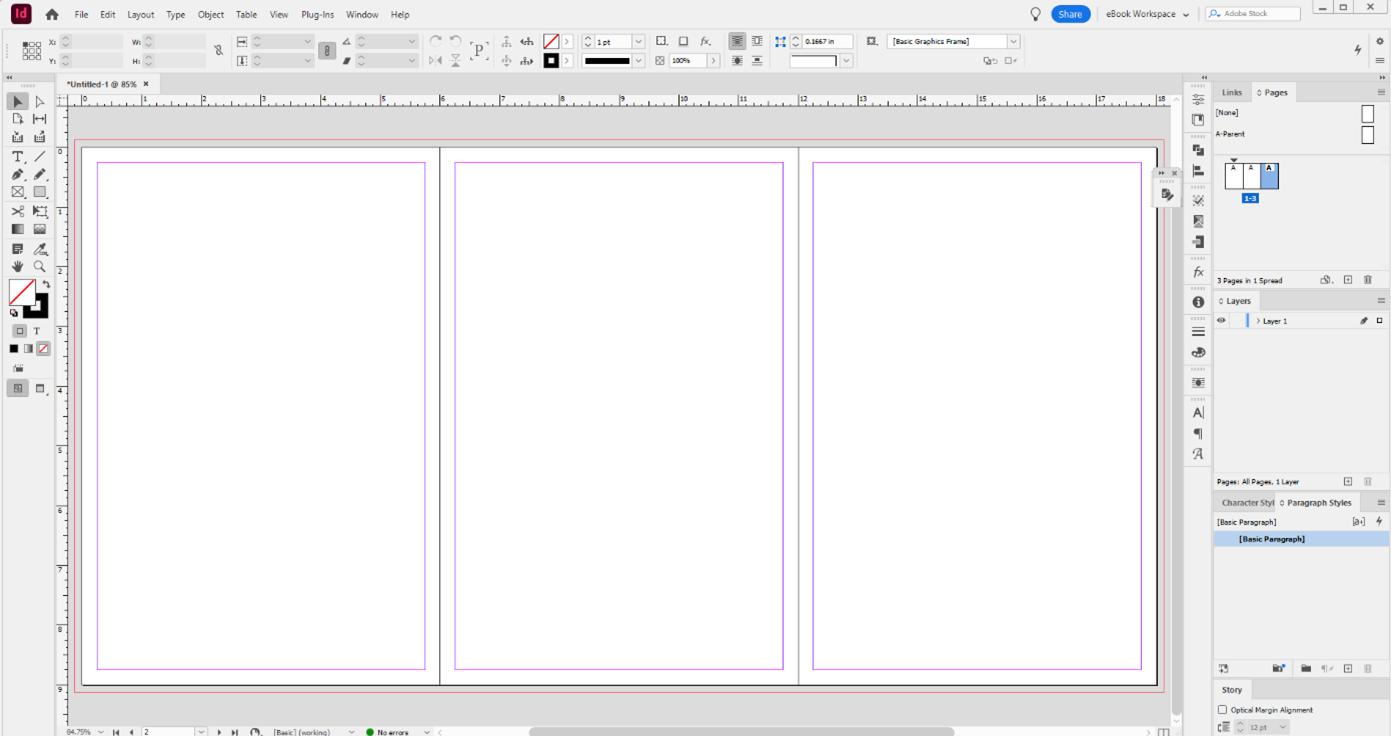
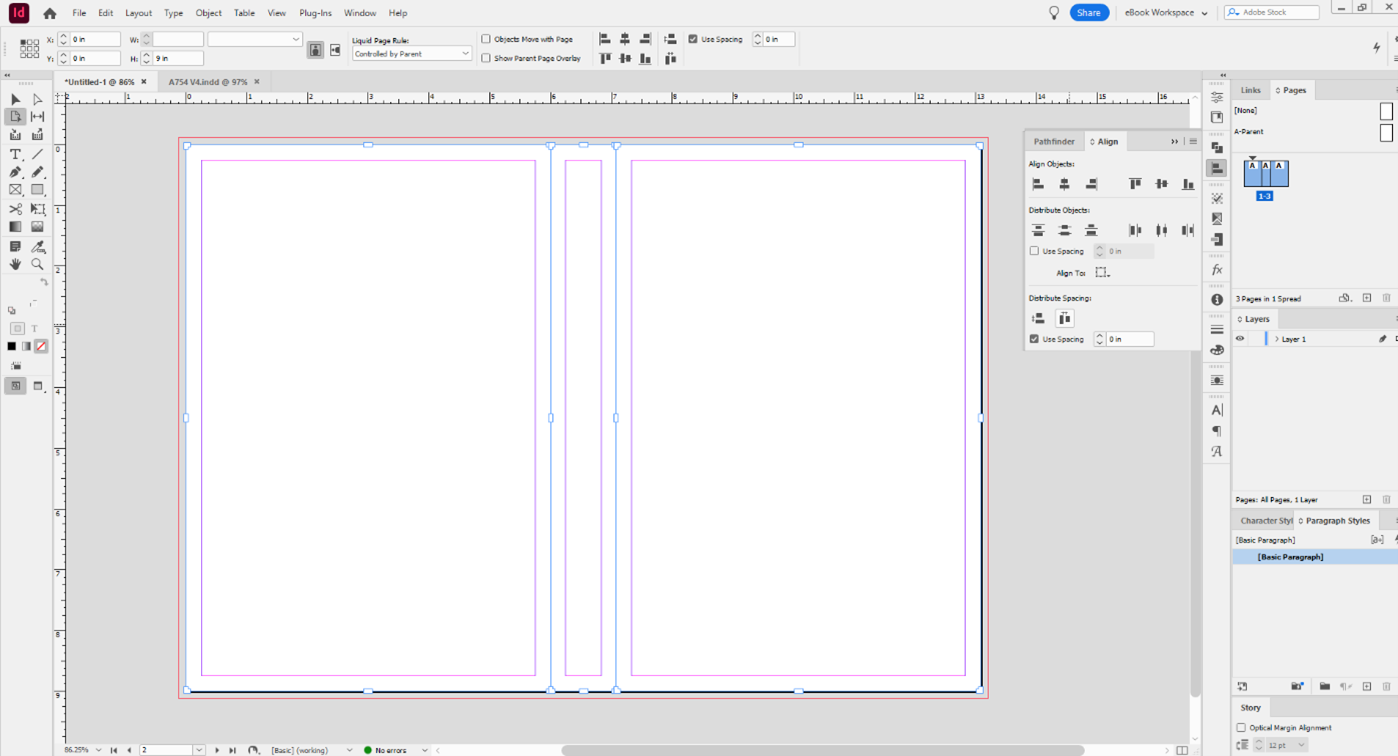
Using the Page Tool, select the center page (this will be your spine) and then in the width box in the tool bar at the top, enter in the spine width, once done your layout should like the one below.
Next, select all three of the pages and using the align button, hit the distribute spacing (distribute horizontal space) this realigns everything correctly for you, again, see the example below.
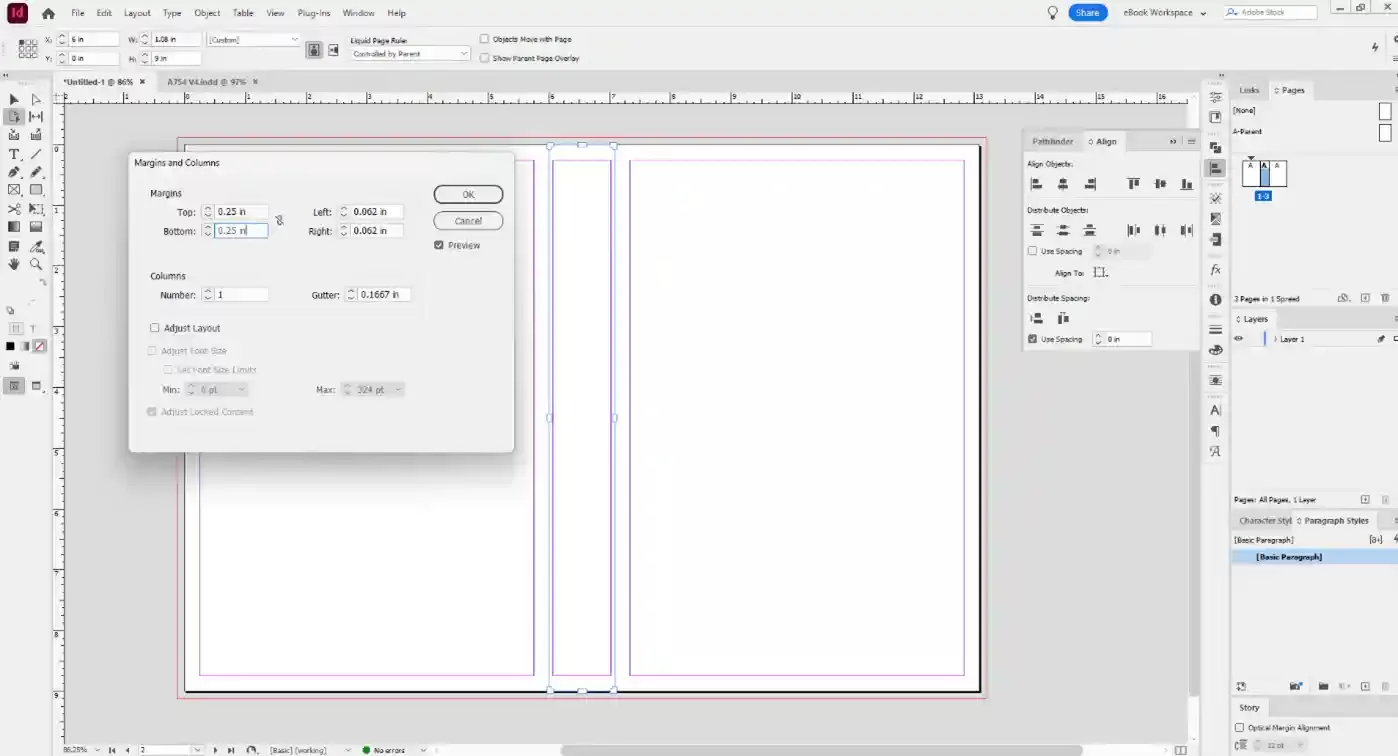
You’ll next want to change the margins within the spine to 0.062in on the left and right side only the top and bottom can stay the same, so, select the spine only (again, using the Page Tool) and then in Layout, select Margins and Columns, the box below will pop up and allow you to change those specific margins.
You’re now ready to add the artwork to the layout, go to File then click Place, it will allow you to add your Photoshop artwork to the layout, you’ll click into the top left corner of what will be the back page, this will drop your artwork into the layout.
You can add the text elements to your book cover, titles, names, subtitle, blurb, quotes, just make sure you leave enough room for the barcode. If you are using KDP’s free ISBN then leave the barcode area empty as they will place a barcode here for you, if you are using your own ISBN, then you will need to add a barcode to the back of the book yourself.
Once you have the book cover ready, and are happy with everything, you’ll need to export it ready for upload.
To do this, select file from the tool bar at the top of the page, then select Export from the menu, you’ll next select where you want to save the file on your computer and also what you’ll want to name it. Once you’ve done this and hit save, you get a Export box pop up on the screen.
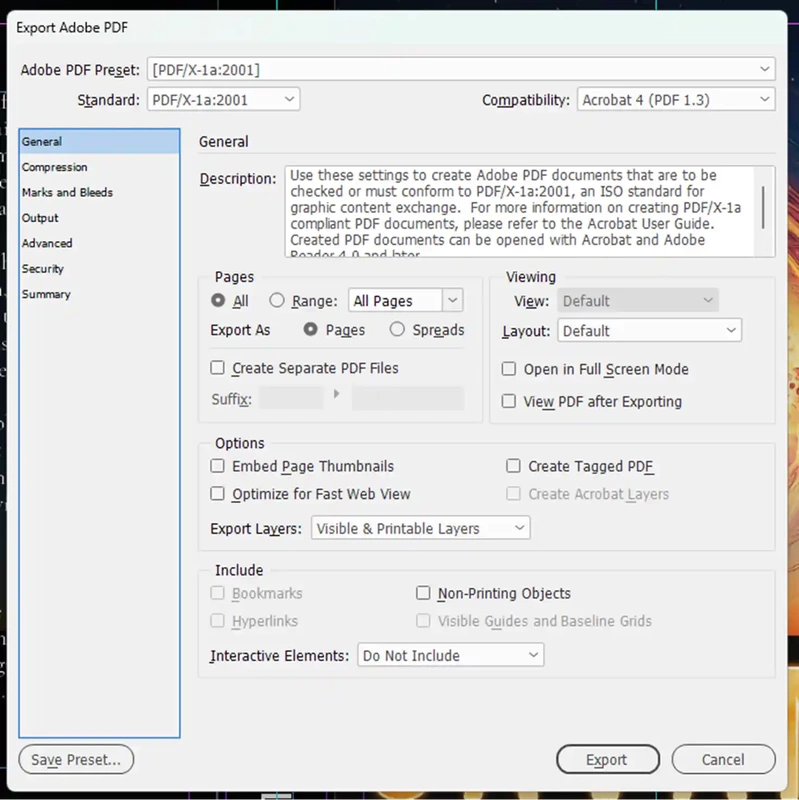
Here you will need to make a couple of changes so that the cover design will work for KDP, firstly on the General Tab, select Export as Spreads (and not pages),
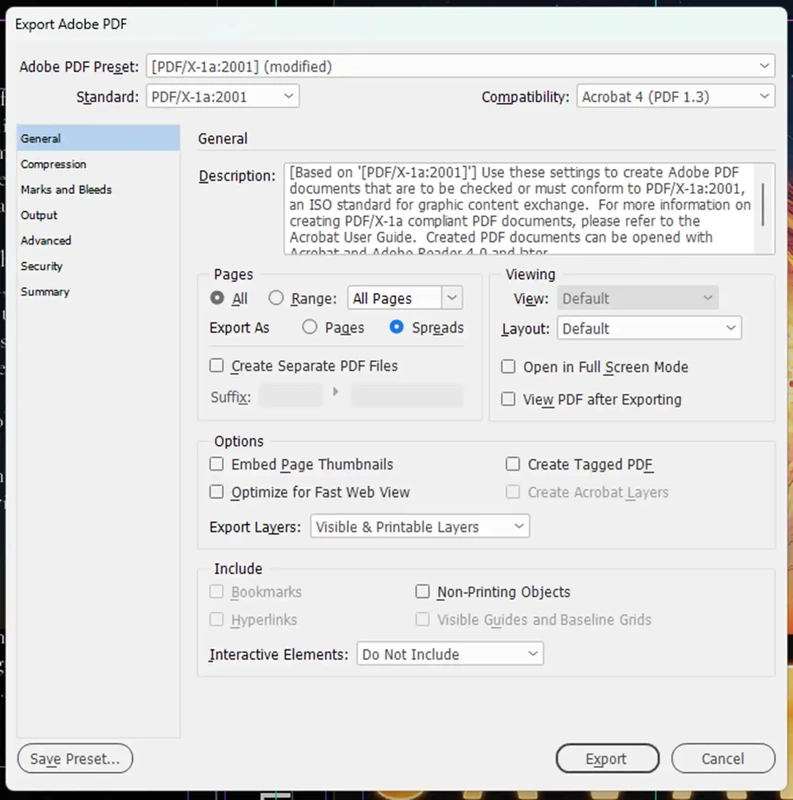
You shouldn’t need to change any of the other settings for KDP, so you can now click on the export button at the bottom of the box, this will now create your book cover as a PDF ready for upload.
Again, it does help to have some knowledge of Adobe’s products beforehand, although there are lots of tutorials on Adobe’s website to help, and countless ones on YouTube to make the technical and creative process even easier.